Six Lessons I Learned When Setting Up Temporary Fences
Devlon Ford, ag consultant for Noble Research Institute, shares how he’s applied regenerative practices at home.
Like many Noble Research Institute employees, my wife and I have a small agricultural operation of our own. We began our regenerative journey in 2021 by starting to use rotational grazing on 10 acres of our property.
After weaning our calves, we decided to background them on the 10 acres. We began using temporary polywire fence to create paddocks that ranged between 0.3 and 0.6 acres, based on forage availability.
The paddocks were set up for a three-day graze period, since we live about 30 miles away. The water source was a pond at the center of one end of the 10 acres, so we made a water access trap around the pond in order to water the calves. We didn’t want to invest a lot of money upfront in fencing, so we cut some corners.
Here are six of the valuable lessons we learned:
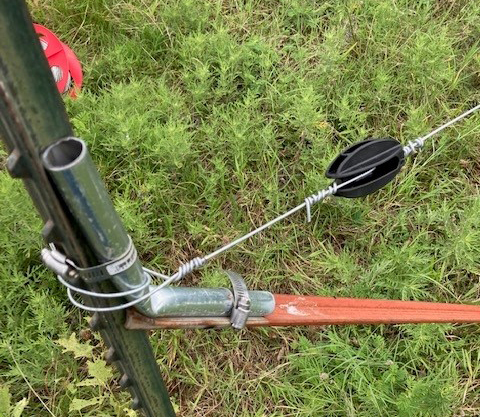
1. Use High-tensile Wire For Perimeter Fencing, With A Tip For Corners
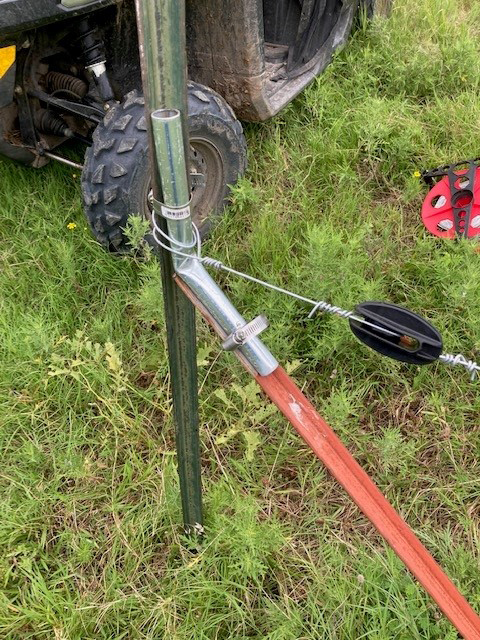
In 2020, I used polywire to fence off the south side of this 10-acre tract. When we decided the next year to start our regenerative journey, we decided to replace the polywire with 12.5-gauge high-tensile wire. Rather than build metal or wood stretchers, I revised an old technique used at Noble in the mid-1990s. Former employees R. L. Dalrymple and Brett Flatt found that a t-post driven upright and a t-post driven at an angle could be fastened together by bending an 8-inch-long piece of ¾-inch-diameter conduit, using two radiator clamps to secure the corners.
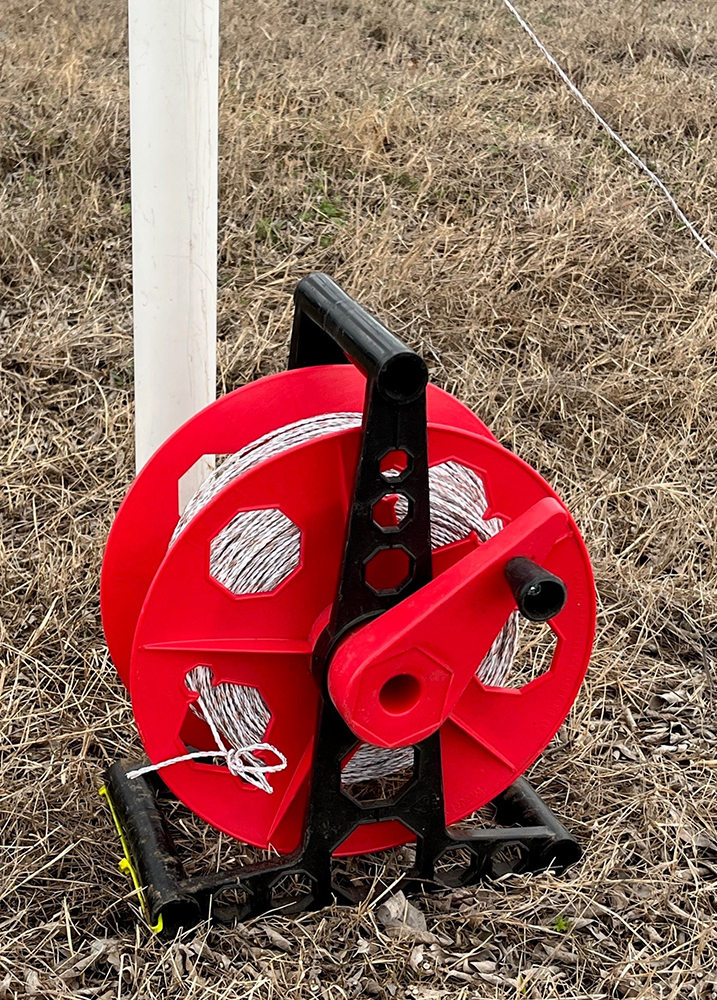
2. Buy Enough Polywire For Multiple Paddocks (And Consider A Geared Reel)
To help keep costs down, we bought enough of the smaller braid polywire to install four to five stretches of fence at once. When the calves had moved into the last paddock, we would roll the wire up, pull the post and prepare to build the next set of paddocks.
Again, to save money, we chose not to buy a geared reel. Instead, I bought an extension cord reel to use in rolling up the wire. This worked pretty well, but was very slow. I eventually began untying the wire from the posts at both ends and pulling the wire to where we needed it.
Once the fence was up, I would splice any excess wire onto the wire on the reel and roll it up. Or if more wire was needed to finish the run, I would splice onto the wire reel and keep on fencing. I would like to point out that splicing polywire together multiple times can decrease the power of the fence.
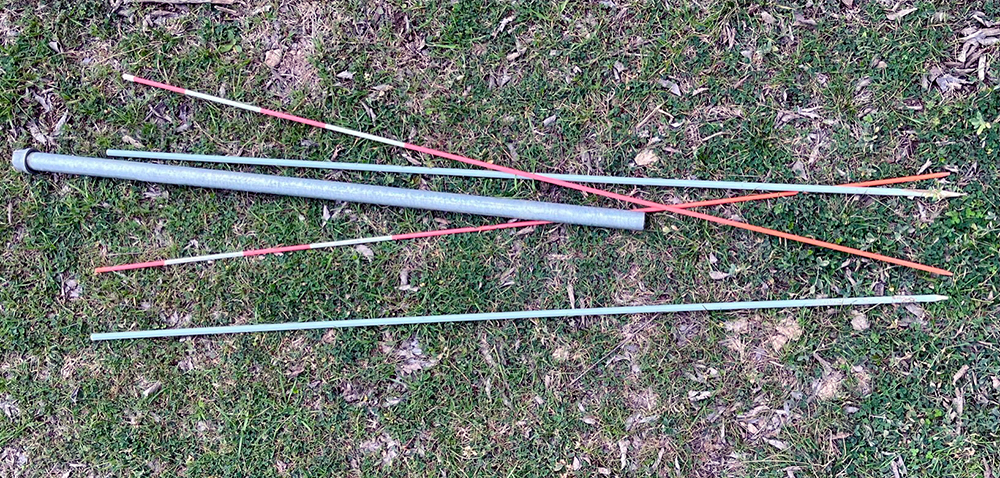
3. Select Posts That Work For Your Conditions Year-round
We started out using black plastic tread-in posts. These were great in the beginning when the weather was cooler and the ground had adequate moisture, but as the weather warmed up and the ground dried out and got harder, the black post became too limber to tread in with the soil conditions we had.
We wound up going back to the standard 3/8-inch fiberglass posts and drove them into the ground with a 3-foot-long, ¾-inch diameter capped galvanized pipe. Rather than using insulators or clips to position the wire at the proper height, we wrapped the wire around the post.
4. There Are Other Ways To Economize On Posts
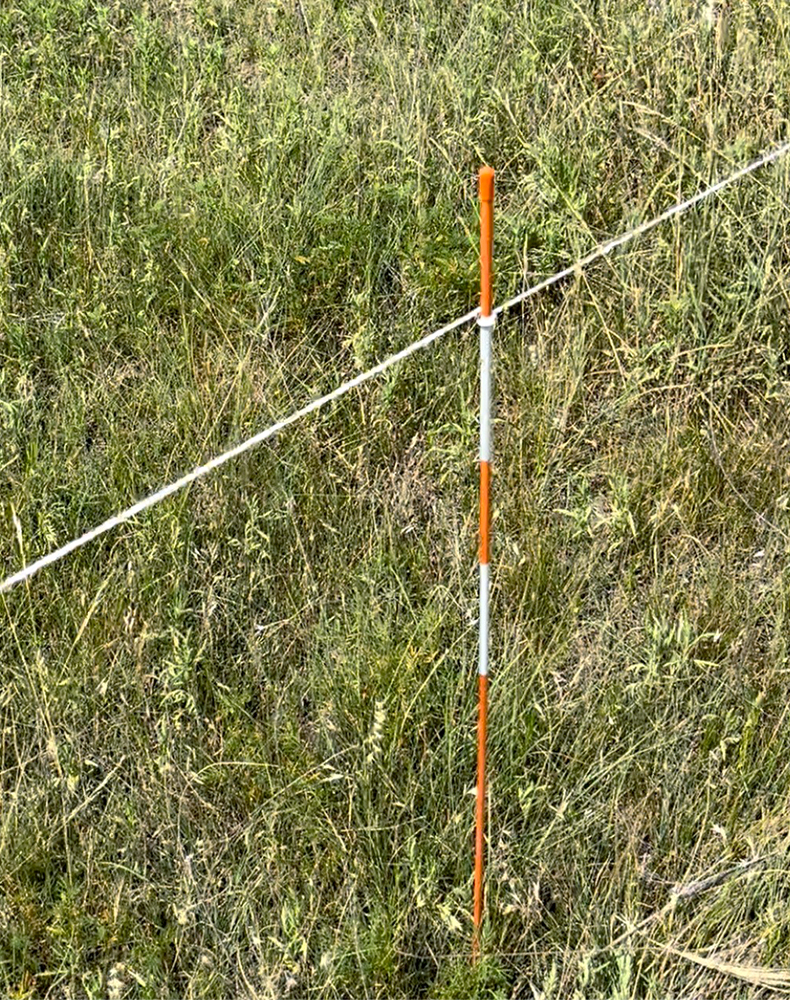
The 3/8-posts cost about $2 each. I wanted to find a cheaper substitute for at least some of the posts. We found some ¼-inch x 4-foot reflective snow stakes that cost about 80 cents each. I placed three of these snow stakes between the 3/8” post with great success.
I was concerned when I received them that I would not be able to drive them in the ground, but the stakes came with a drill bit that I use in my cordless drill. This makes them easier to set: just drill the hole, put in the stake, and give the top a tap with a hammer to set it.
5. Plan Paddock Design Before You Start Building
When we started, we did not have a plan for the design of every paddock. We just started building fences. We knew the calves needed access to the single water source and that we needed to optimize the forage supply, but, beyond that, very little strategy went into it. We were about 18 days into the process when we figured out that the roughly pie-shaped paddocks were not going to be very advantageous to properly graze the area. At this point, we knew we had to develop a plan, or we would not be successful in our grazing.
We looked at the grazed vs. the ungrazed areas and designed our fence locations ahead of the next build. The advance planning we did on the next go-round decreased the time it took to build the paddocks, as we knew approximately where and how to run the temporary fences.
6. It’s Good To Get Off The UTV And Walk While Fencing
It is my natural inclination to ride or drive while fencing. But since I was grazing such a small area, I was knocking too much forage down while driving back and forth.
Laying forage down on the soil can be a good practice, but I would rather achieve this soil-health benefit through animal impact and stock density, not with a UTV. I decided to start walking while building fence, which helped me lead a more active lifestyle and was healthier for me as well.
Walking also allows me to observe what was going on with the grass, soil and animals before and after a grazing event and adjust my management if need be. Monitoring the forage, soil and manure piles gives us an idea of how our management decisions are impacting our environment and animals.
Not surprisingly, we discovered that planning our fencing in advance would have been the most valuable thing we wish we’d known. Without a plan when we started, we built fence in a less-efficient manner and lost valuable time, either standing in the sun or looking for a shade tree to think about what to do next.
As you enter your regenerative journey, rather than just using fence to keep your livestock at home, put your fences to work for you to improve your soil, forage, ecosystem and animal performance. We hope some of the lessons we learned the hard way will help you on your place.
Devlon Ford
Devlon Ford is a Regenerative Ranching Advisor at Noble Research Institute. He specializes in animal handling protocol, herd management and technology advancements in record-keeping. Before coming to the Noble Research Institute in 1993, Ford worked in the oil and gas industry and at Merrico Land and Cattle Co. He grew up helping on a family farm in the south-central Oklahoma communities of Lone Grove and Springer.
Comment